Pages

Tuesday 15 December 2015

Paper Clutch

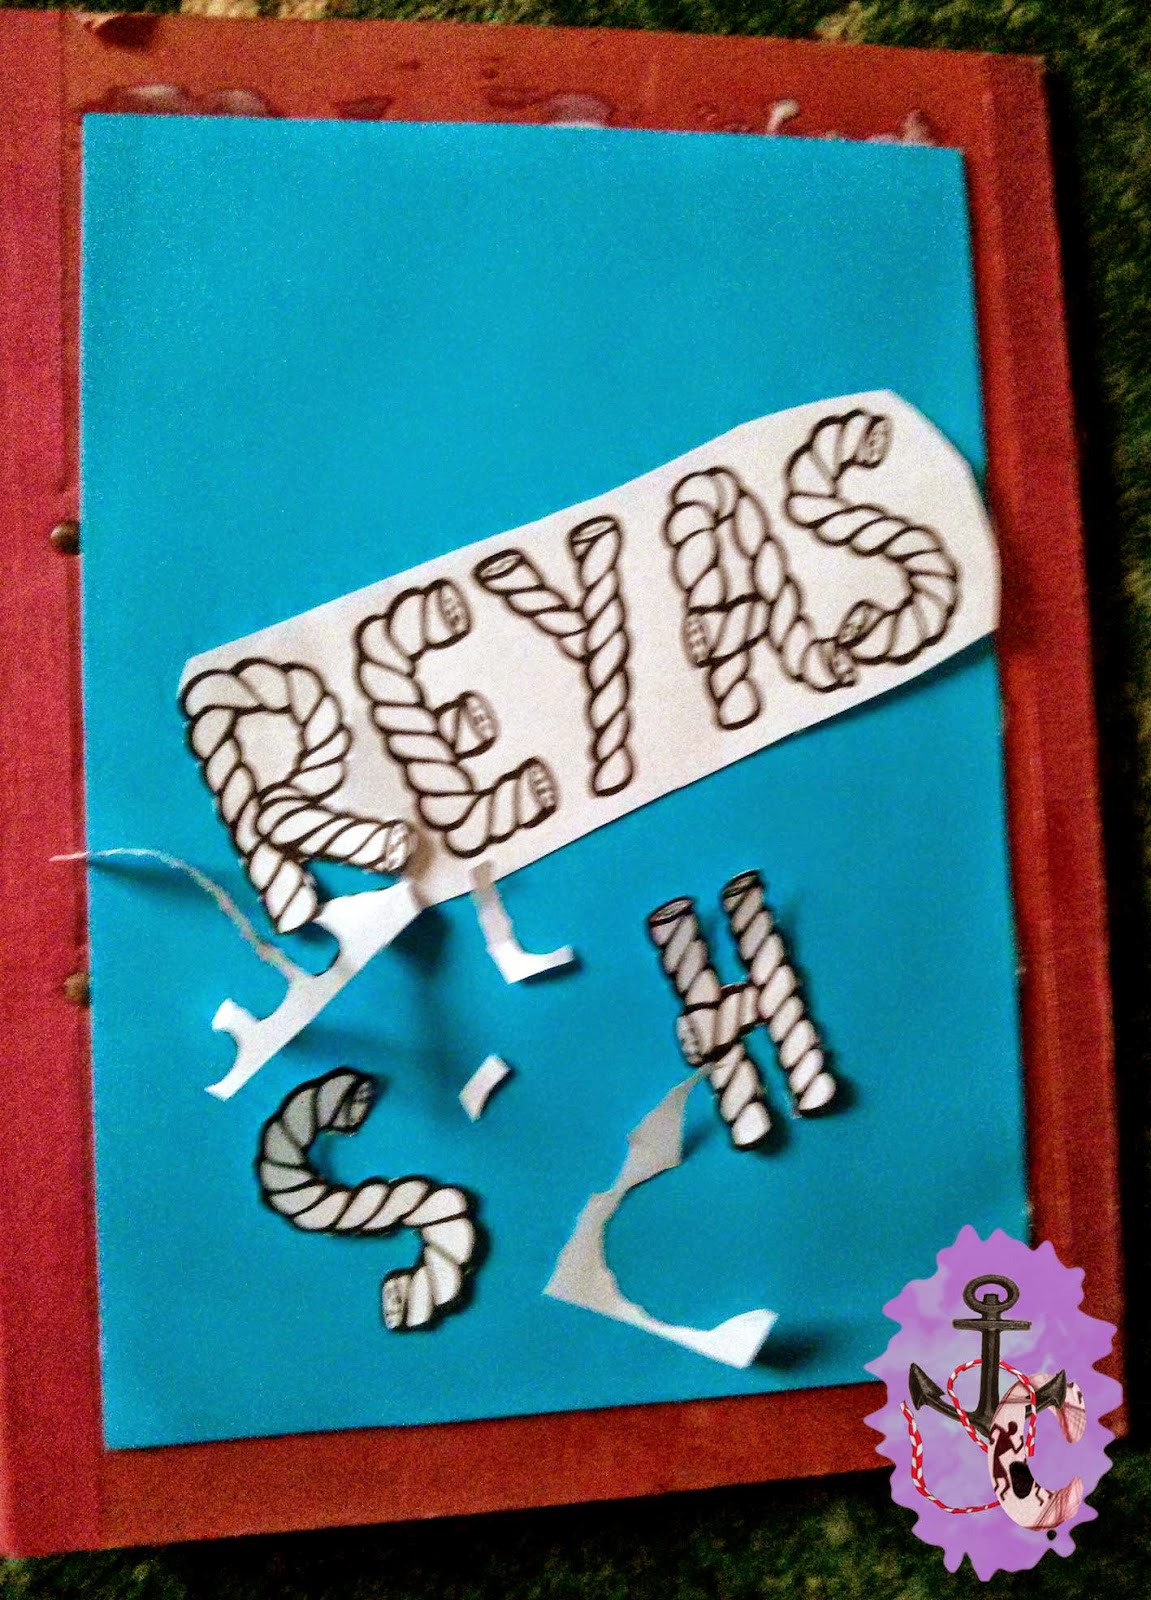
A perfect gift for that special someone...

Another idea to up-cycle newspaper. I found this on YouTube and was impressed.  I had my own ideas but was doubtful if my idea would work. I had already failed one attempt!!!

Well this one is fairly simple. Only time needed is to make paper rolls and the time for the glue to dry. Make paper rolls. You will need as many according to the size of your purse. I used about 30. Also it will be better to have a standard paper size and something to roll on to keep all rolls same. I used half news paper for each roll and a thin curtain rod to roll on. Then stick the edges so the roll remains intact.

Weave the rolls like a mat as per required size. Apply glue on one side and stick a cloth of same size. On the other side, which will form the main face of the clutch,  I used spray paint.


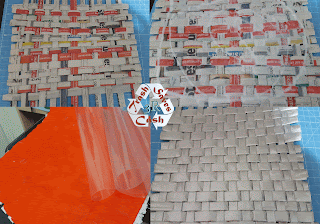
Once everything was dry, I trimmed the edges, put OHP sheet over the entire area and covered the edges with thick paper. I used nail Polish on the border. You could use any waterproof paint. Then I folded the paper mat into my desired shape. After sometime, the shape stays in place. I sewed the two endsides with thread to hold them in place and also added some beads on the outside to make it look decorative and give space to put hand to retrieve things. Then I closed both the open edges on the sides with more pieces of OHP sheets to join the edges and avoid things falling off.


I then sewed a button at the front and covered with decorative sticker. The last bit was adding a thread to keep the clutch closed. Instead on making a loop in the thread, I used the mechanism of going around the button once.


This can be a beautiful up cycled gift made with love for the person and care for Mother Earth!

Thursday 10 December 2015

Wall Decor

When Christmas arrives, though it brings festivity and cheer all around, it also brings expenses in the form of gifts. So over next few days, I thought I will share some of my festive ideas that not only look good and elegant but also save some hard earned cash.
The below wall decor was made as a present. It turned out so well that you could not identify what it was made of even after holding it in your hands!

The frame was completely made of newspaper rolls. I had four thick and long rolls of news paper and another slightly smaller and thinner ones.

These were then given one layer of white paper coating so that the paint looked good. This final paper was glued very neatly to give a smooth finish. Then all of them were painted in metallic brown.

Once everything was dry, I arranged them in the fashion pictured and glued them in place. Then I tied white string at the joints to give an antique look.  The hanging loop is also made of the same string.

My son then made a Warli painting on a piece of paper as per the small central space and we stuck it in place to complete the wall decor.

The frame was very strong and lasted for years!

This can be an ideal gift for art lovers.


Saturday 28 November 2015

Quilled Card

Its been a week since the birthday of my blog. So here's a card wishing my blog a very happy birthday.

Since Christmas is only a few weeks away....its almost there, I thought of giving some DIY ideas for Christmas gifts. This is the first one of them. Its a Birthday card, but can be changed to any occasion!

How I made this card:


I made some quilling shapes out of paper. Tutorials for making these can be found in abundance on the internet. So I am not going into details of that. I had very limited supply of materials, so I used whatever I had. I had made these quilling shapes sometime ago. All I needed was to arrange them in some beautiful pattern. I modified the centre white one to make a beautiful butterfly. Added some detailing with a black marker and added two antennas.
The flower had a big hole in the centre which I did not like. So I added an yellow bead and it looked fabulous.
After glueing the flower and butterfly on to the card, There was still some space at the bottom. I like the size and shape of the card and did not want to change it. But I did not have any more quilled shapes and also did not want to spoil the design I had made.
I had a wrapping paper from some gift my son had received on his birthday. It had "HAPPY BIRTHDAY" printed all over. I cut one of them in rectangular shape and it fitted my card exactly! The card looked beautiful too. So this completed my card.

Envelope:


Now my card was ready but it had no envelope. The standard A4 sheet was too small to make one for the card. So I decided to add some colour to it. I took the pink sheet of paper I had used for quilling the flower and cut it into two stripes. I then glued one on each side of my A4 sheet. Now I had a bigger paper which could make a bigger envelope for my odd sized card.
My envelope matched and looked very beautiful with the card in it.


Thursday 22 October 2015

Happy Dussehra...

Happy Dussehra to all of you.


Today along with celebrating the victory of Good over Evil, I also celebrate people who are real fighters. Those people who fight the problems in their life and emerge as heroes, each one in their own unique way!!!

Some fight for their independence, some for their rights. But there are some who fight against the deadly diseases like cancer which crawl in without notice. But mind you my heroes are those who do not give up. Even if everyday is a struggle, even if every minute is painful, they endure it with a smile that never leaves their lips. These people are an inspiration to all of us. They touch our lives in a very special way. But alas! some lose their fight. They are still heroes. Winning a battle is not a measure but the resistance you have to give up is. These give us the message that 'Life is a gift. Enjoy it while it is with you. It may be snatched from you before you realise.'
Today I pay tribute to my friend who recently lost her life to cancer. Her magnetic smile will always be with me.

Today I celebrate the life of all those people who in spite of their everyday struggle, strive hard to live life to the full and inspire us. I am lucky to work closely with one such lovely lady. She had a life changing event when she had a stroke. Everything that was simple, suddenly turned into a strenuous and gargantuan tasks. But she has not given up. Today she is learning new skills. Her speech impairment and mobility problems which were a result of the massive stroke she had have failed to take over her spirit. They always will. She is a pleasure to be around. She is now learning to blog her experiences so that other people find it helpful.

You may reach her blog by clicking on the following link:
http://survivorafterstroke.blogspot.co.uk

Do visit her blog and let her know how much her work is appreciated.

Sunday 30 August 2015

Hologram

This toy creates a hologram inside it. ofcorse its not a real hologram but is just as good as a real one and can light up your mood when you are low.
The toy works by reflecting the light form the phone to the plastic.

1. Find a plastic cd cover which is see through or any see through sheet.
2. You will need to cut out a trapezium from plastic; bottom of the trapezium 6cm, top of the trapezium 1 cm. Repeat 4 times. (make sure that you can fit in four in one disk cover)
3. Attach the trapeziums to each other so they make a pyramid.
4. Load up a youtube video on your phone link is
https://www.youtube.com/watch?v=Wsg8KDKVNGE
5. Place your object on the phone up side down with the big square on the top.
6. look through the sides and enjoy!

Wednesday 19 August 2015

Magical Fan

This is a simple toy which is fun and easy to make.It is a toy which needs 3 A4 sheets of paper, some tape, string and some glue.

1. Roll the first bit of paper into a tube (role it length way)
2. Do the same to the other paper excpet width ways.
3. With the last paper make a fan.
4. Stick the fan to the end of the long tube.
5. At the tip of the fan stick two strings
6. Connect the end of the strings to the short tube


7. And enjoy

Friday 31 July 2015

Robotic Hand

                                                               
A second one in my toys series:

This toy is a toy where if you pull the strings then the fingers close and open. You can control the movement of the fingers by pulling different strings. This is a scientific model of the hand and shows how the tendons in our hands work to help us grab things.

Follow the steps to make your own robotic hand:

1. Draw around your hand.


2. Copy the drawing onto a card sheet. (I used a cereal box)

3. Cut out the card hand.

4. Cut the card hand at all the joints.

5. Stick the card hand pieces to the paper hand leaving a gap so the paper can bend.


6. Stick on small straw bits on the card as shown. Keep the straws as small as possible so they don't hinder the finger movements. Each finger will have about three straws followed by the bent bit of the straw on the palm.


7.  Thread the straw and glue the thread to the very tip of the finger. Each finger should have one string passing through it. The other end of the string is free to move. When each string is pulled, it closes the finger it holds to.


8. Decorate the hand and then enjoy.

Shreyas

Sunday 26 July 2015

Slithering snake

I am starting a series of simple homemade toys and here comes the first one:

Over the past few days I have been making some toys. These toys work on the basis of science. The slithering snake is a toy where you have to pull the string and make it go forward. It is a simple rubber band toy that looks cool and is fun to play with. This toy is one of my favourite in them so lets get to it...


1. I made a spindle out of play dough with a rubber band sticking through (tip:make two holes so you have a loop which turns with the spindle.)

2. Make the snakes head and tail and add any accessories you'd like. E.g glasses, eyes, tongue

3. To make the body go to my youtube video at https://www.youtube.com/watch?v=LHbnKFDuH_k

4. Connect the head, body and tail.

5. Then take the spindle and attach it to the head.

6. Wrap a thread around the spindle and put it through the forehead.

7. Sit back and play away.

- Shreyas

Sunday 28 June 2015

Solar System

                                                                
When school give those "whacky" homeworks you can never expect what it will be; so this times long term homework was a model of the solar system. I went through all my stuff and found a bunch of newspaper, cereal boxes, a long wooden board from the back of a cupboard and a bunch of small and big balls at my disposal.So this is what I created...


I started by sticking paper onto the balls and made different sized planets. For Saturn, I used a disc cut out from the cereal box. I pasted a lot of paper over it make it thick. Then I painted them all different colors according to the colors of the planets. After that I got the board and painted it completely black. Then I started to paint the sun. I used a mix of red, yellow and orange. I stuck the planets on to the board in their proper order. When the planets were stuck on firm I painted on their orbit. I found little info on the planets on the internet, made small slips, took a printout and stuck them on too beside each planet.

I used pieces of Styrofoam to form the asteroid belt.


I have now kept that as a poster in my room and look at it every morning. 

Thursday 4 June 2015

Hamabead Nameplate

Hamabeads are so popular with kids. Children can spend hours together creating so many different shapes with those lovely coloured beads. You can make flowers, sea creatures, ships, hearts, and anything that you can imagine.

Today I have brought you an idea where you can make an useful item out of Hamabeads. How about making a nameplate for your room with these wonderful beads? It looks awesome when your name emerges from combining those small colourful beads and joining them with a touch of hot iron. Here is what I made out of hamabeads two years ago and it still hangs on my door proudly.


Monday 1 June 2015

Handmade vehicles...

How does it feel when you lose a competition? Not just lose, but lose very badly and that too to when your opponent is a kid! I felt very happy:-) Yes. I am not lying...

Yesterday was the last day of half term holidays for school and the weather was very bad. So no chance of going out to play. Board games - very bored. TV - A big NO NO. So my son came up with a brilliant idea. He took out some materials like ice lolly sticks, rubber bands, wooden skewers, etc and challenged me to build a working vehicle.

At once, we both set to work. I cut out five wheels from cardboard and started assembling them (With some small tips from my son!) I almost completed my vehicle and the last stage was to fix the rubber bands. After 3 failed trials of trying to stick the rubber bands to the wooden spoke, he told me that rubber bands don't stick with hot glue:-( With great difficulty, I attached the rubber bands and here is my vehicle which moved about 2 cms on its own!
Working hard!
My Creation

On the other hand, Shreyas' vehicle turned out to be so successful that it could go over hurdles without stopping and could cover almost 20 times the distance than mine. He used the same rubber band principle but in a different way. Kudos to you Shreyas. Well Done and I am happy to lose to you always but only after giving you a tough competition.
Winning model
.

Monday 25 May 2015

Heart For Harlow...

I have to start this post with a big thanks to Integration Support Services for believing in us and providing a platform for us to display our talent.

Yesterday we attended the "Heart For Harlow Festival" on the grounds of water Gardens. We were part of Integration Support Services where my son displayed the toys he had made most of which were science related. Some people were amazed and others were immensely impressed. All in all it was a big success and a great boost for my son.


Thursday 7 May 2015

Pencil Case / Small Bag

How about using an old torn backpack and turn it into an awesomely useful pencil case or another smaller bag?

When my son's regular pencil case got torn, he really wanted a new one which I did offer to buy from the shop. But he wanted a big one, one which can hold lots of things. I did not understand why he needed a big one since all he needed to put in were a few pencils, pens and may be a ruler and eraser. But I was surprised to see the contents of his bag....It had everything I would not expect....Can you guess...it had a magnifying glass, a paper cutter, a few rubber bands, toothpicks, etc.,etc...He uses these to create his designs and experiment during free and break times. He does make some awesome stuff like shooters, uniquely designed paper planes which really work well. So my task was to make a big bag enough to hold all his stuff and small enough not to look like a backpack.

New small bagOriginal backpack Front pocket cut out
I had one old backpack whose main zip was broken and could not be repaired. So I cut it out and took the smaller front pocket. This would be my new bag. I took off all the hooks and one damaged zip on the front. The bag was stitched all around to make to look nice. I sewed Velcro for the front pocket whose zip was taken out. And that's it...A nice new looking small bag with lots of pockets ready to be used as a pencil case or as a small book bag. If needed, you can attach some handles to it. I did not need that as this was supposed to be used as a pencil case.

Wednesday 15 April 2015

Handmade Toys


This Easter,I had fun making toys with this little kid. Simple homemade toys especially made by kids themselves bring so much joy and boosts their creativity. It also makes them think why certain things behave in the way they behave and hence teaches them the principle behind these toys in a fun way.
Magic Fan
Walking drum
Woodpecker


I bet you can't get these toys anywhere in the market. Have fun!

Friday 3 April 2015

Easter Egg

Its Easter time and also time for some eggs...
I made this Easter egg with tissue paper.

Raw Materials:

  1. Tissue papers
  2. Glue
  3. Small balloon
  4. Water
  5. An Easter chick or chocolate to put inside.

Method:

  1. Tear the tissue paper by hand into small pieces. The pieces can be any size and shape. It simply does not matter. Make sure the pieces are not too big.
  2. Roll each piece of paper between your palms to make small paper rolls. They roll up very easily and quickly. You can wet your hands with a few drops of water to make it more faster.
  3. Stuff the balloon with the chick or chocolate as you wish.
  4. Blow the balloon to the size you want your egg to be and tie its mouth.
  5. With the help of glue, paste these tissue paper rolls on to the balloon. The paper does not stick easily. But with a little practise, you will be able to do it.
  6. Let it dry well. Once the assembly is completely dry, it becomes hard. Now pop the balloon with a pin and take it out through one of the many holes.
  7. Your Easter egg is ready to be gifted.
HAPPY EASTER!!!

Friday 27 March 2015

Paper Mache

Paper Mache is one art that has always fascinated me. I had learned it from a TV show when I was a kid and was surprised to see how a few delicate sheets of paper could join and make a strong structure. It is only your imagination that limits what you can create. I remember the first bowl I made as a kid. I painted and covered it with varnish to make it waterproof. We used it till I finished college!!!

My son has made a few of them and here are two of them...

To make Blue Bell:

Blue Bell was created when Britain hosted the Olympic games in 2012. He was designed to be the Olympic Mascot.
To make Bluebell, the first step was to make a paper cone and fill it tightly with news paper without disturbing the shape of the cone. Then close the mouth of the cone by gluing a sheet of paper.
Make a few thick strips of paper. You can do it by rolling newspaper and then sticking at the end to prevent it from unrolling. Now paste these strips at the flat end of the cone.
Apply one or two layers of tissue paper to make its skin look good. After everything is dry, apply an even coat of the color of your choice. We chose Blue and Orange.
To make eyes and mouth, we took help of the Pizza carton. The eyes are made of cucumber and mouth is tomato;-)
Cut thin strips of paper and color them with the colors of Olympic rings. Paste them on Blue Bell's head.
This completes the Olympic mascot.
The hidden secret of Blue Bell is that if you turn Blue Bell upside down, he becomes the Olympic torch!

The second one is named MUSHI....Not the Moshi Monsters though. We had not heard about them till then.

To Make Mushi:
To start with, we made two paper balls and pasted them one above the other. Then cut two identical cardboard pieces to resemble wings. We also cut two cardboard pieces to form legs for Mushi. The cardboard pieces were held in place with the help of sticky tape. After that the whole structure was covered with two layers of tissue paper.
Now came the colorful bit....Shreyas chose yellow for the body and orange for the limbs. You need to be very careful while painting because the tissue paper tends to rip off. Just dab the color with cotton ball. Once everything is dry, use paintbrush to make the facial features.
The last and final bit was the hair for Mushi. Cut a long strip of paper and then fold it in half length wise. Now open the fold and make cuts on one half of this strip width wise  Now roll this around Mushi's head and glue it in place. Viola! A new creature has just been created.


Monday 2 March 2015

Decorated Folder

How about decorating a kids folder according to the contents of the folder?
This will make the kids open the folder again and again and may be encourage them to go through the contents as well.

Whatever it is....all I can say is it looks beautiful.

I used an old file, some foam, a printout of the name and some embellishments.

Cut the foam to the size of the folder and paste it on the front of the folder.

Then cut the letters from the print and paste it on to the foam. Paste a decorative ribbon on the edges of the foam and decorate the remaining empty spaces with embellishments.


Sunday 22 February 2015

Broken CD - Beautiful Vase

I have tons of CDs which no longer work or are useless. But I don't like to throw them. That shiny surface always holds me back when I want to put them in the bin. So here's what I did with them when my olive oil got over and I had a beautiful green bottle at my disposal.

Step 1: With pliers remove the rings that are surround the rim of the bottle and any other unwanted parts.

Step 2: Thoroughly clean the bottle and the CDs (of course without damaging the shiny surface) to get rid of any dirt or oil. They dry them well.

Step 3: wrap the CDs in a cloth and use a hammer to break them. I used two CDs. The cloth will prevent the pieces from flying and collect in the cloth.

Step 4: Smear one side of the bottle with glue.(I had a square shaped bottle. You can do part by part on a round bottle so the glue does not dry out. Use a strong glue for a lasting product.)

Step 5: Now choose the pieces of broken CD and place them on the glue with shiny side up in a mosaic form. You can play with shapes and sizes so they look different and individual.

Step 6: Keep them to dry and make sure the pieces stay where you have glued them.(keep the bottle on it's side to prevent the mosaic from slide off,out of pattern.

Step 7: Wipe your bottle with a soft cloth to remove any glue sitting on top of the CD pieces and bring back the shine of your bottle.

Step 8: With a ribbon or a thread cover the rim so the groves in the bottle are covered.

Step 9: Place a nice bouquet in the bottle.

Step 10: Admire your creation, your very own CD bottle.

These bottles are easy to make, hardly cost any money and will keep your house nice and beautiful.Why not try some other things that you should keep in like a tiny light or a candle? or maybe change the shape of your container!

Wednesday 18 February 2015

Kid's Collage 2

Its those times when kids have holidays and no one to play with and to make things more worse, you are left alone with them for extended periods of time. What do you do to keep them engaged so that you can complete your household work before playing with them? Its just that little extra time you need.
When my kid was young, I used this trick to keep him engaged. It not only helped pass time but also helped him improve his creativity. All I did was very simple. I took some colorful papers and cut different shapes out of them like triangles, circles, small strips, thick and thin strips, etc. Gave him one A4 plain sheet of paper with a glue stick and asked him to create designs using those paper clips. He could create anything real or imaginary limited only to his imagination. You never know what they may create...We may stumble upon some master artist...

This is what my son came up with during one such session.


I used his talent and coaxed him into creating one very beautiful collage with a combination of plain paper cuttings and magazine cuttings. This time he imagined the picture and asked for images. He also did use the scraps lying around. I had to make him do it a few times before I was satisfied. I sent this creation to a competition held by Ryan Global School, Mumbai and guess what, his creation won the first prize for kid's under 5!


The first image won the prize. But we did not get the art back. So we had create another one on similar lines to display in his school.